What this guide helps you do
Campaigns are how you reach fans and reward them for taking part. This guide walks you through the campaign builder from start to finish, so you end up with a campaign that's either saved as a draft or published and live in the mobile app.
The builder has five steps. You move through them with the Next and Previous buttons, and a progress bar at the top shows where you are. Work through each step in order and you'll have your first campaign ready in a few minutes.
Tip: Fans take part only in the Game Set Engage mobile app. Everything in this guide happens on your club dashboard — this is where you build the campaign that fans then see on their phones.
Open the builder
From the left-hand navigation, go to Campaigns, then click New Campaign in the top right. You land on the campaign builder, starting at Step 1.
Step 1: Choose a campaign type
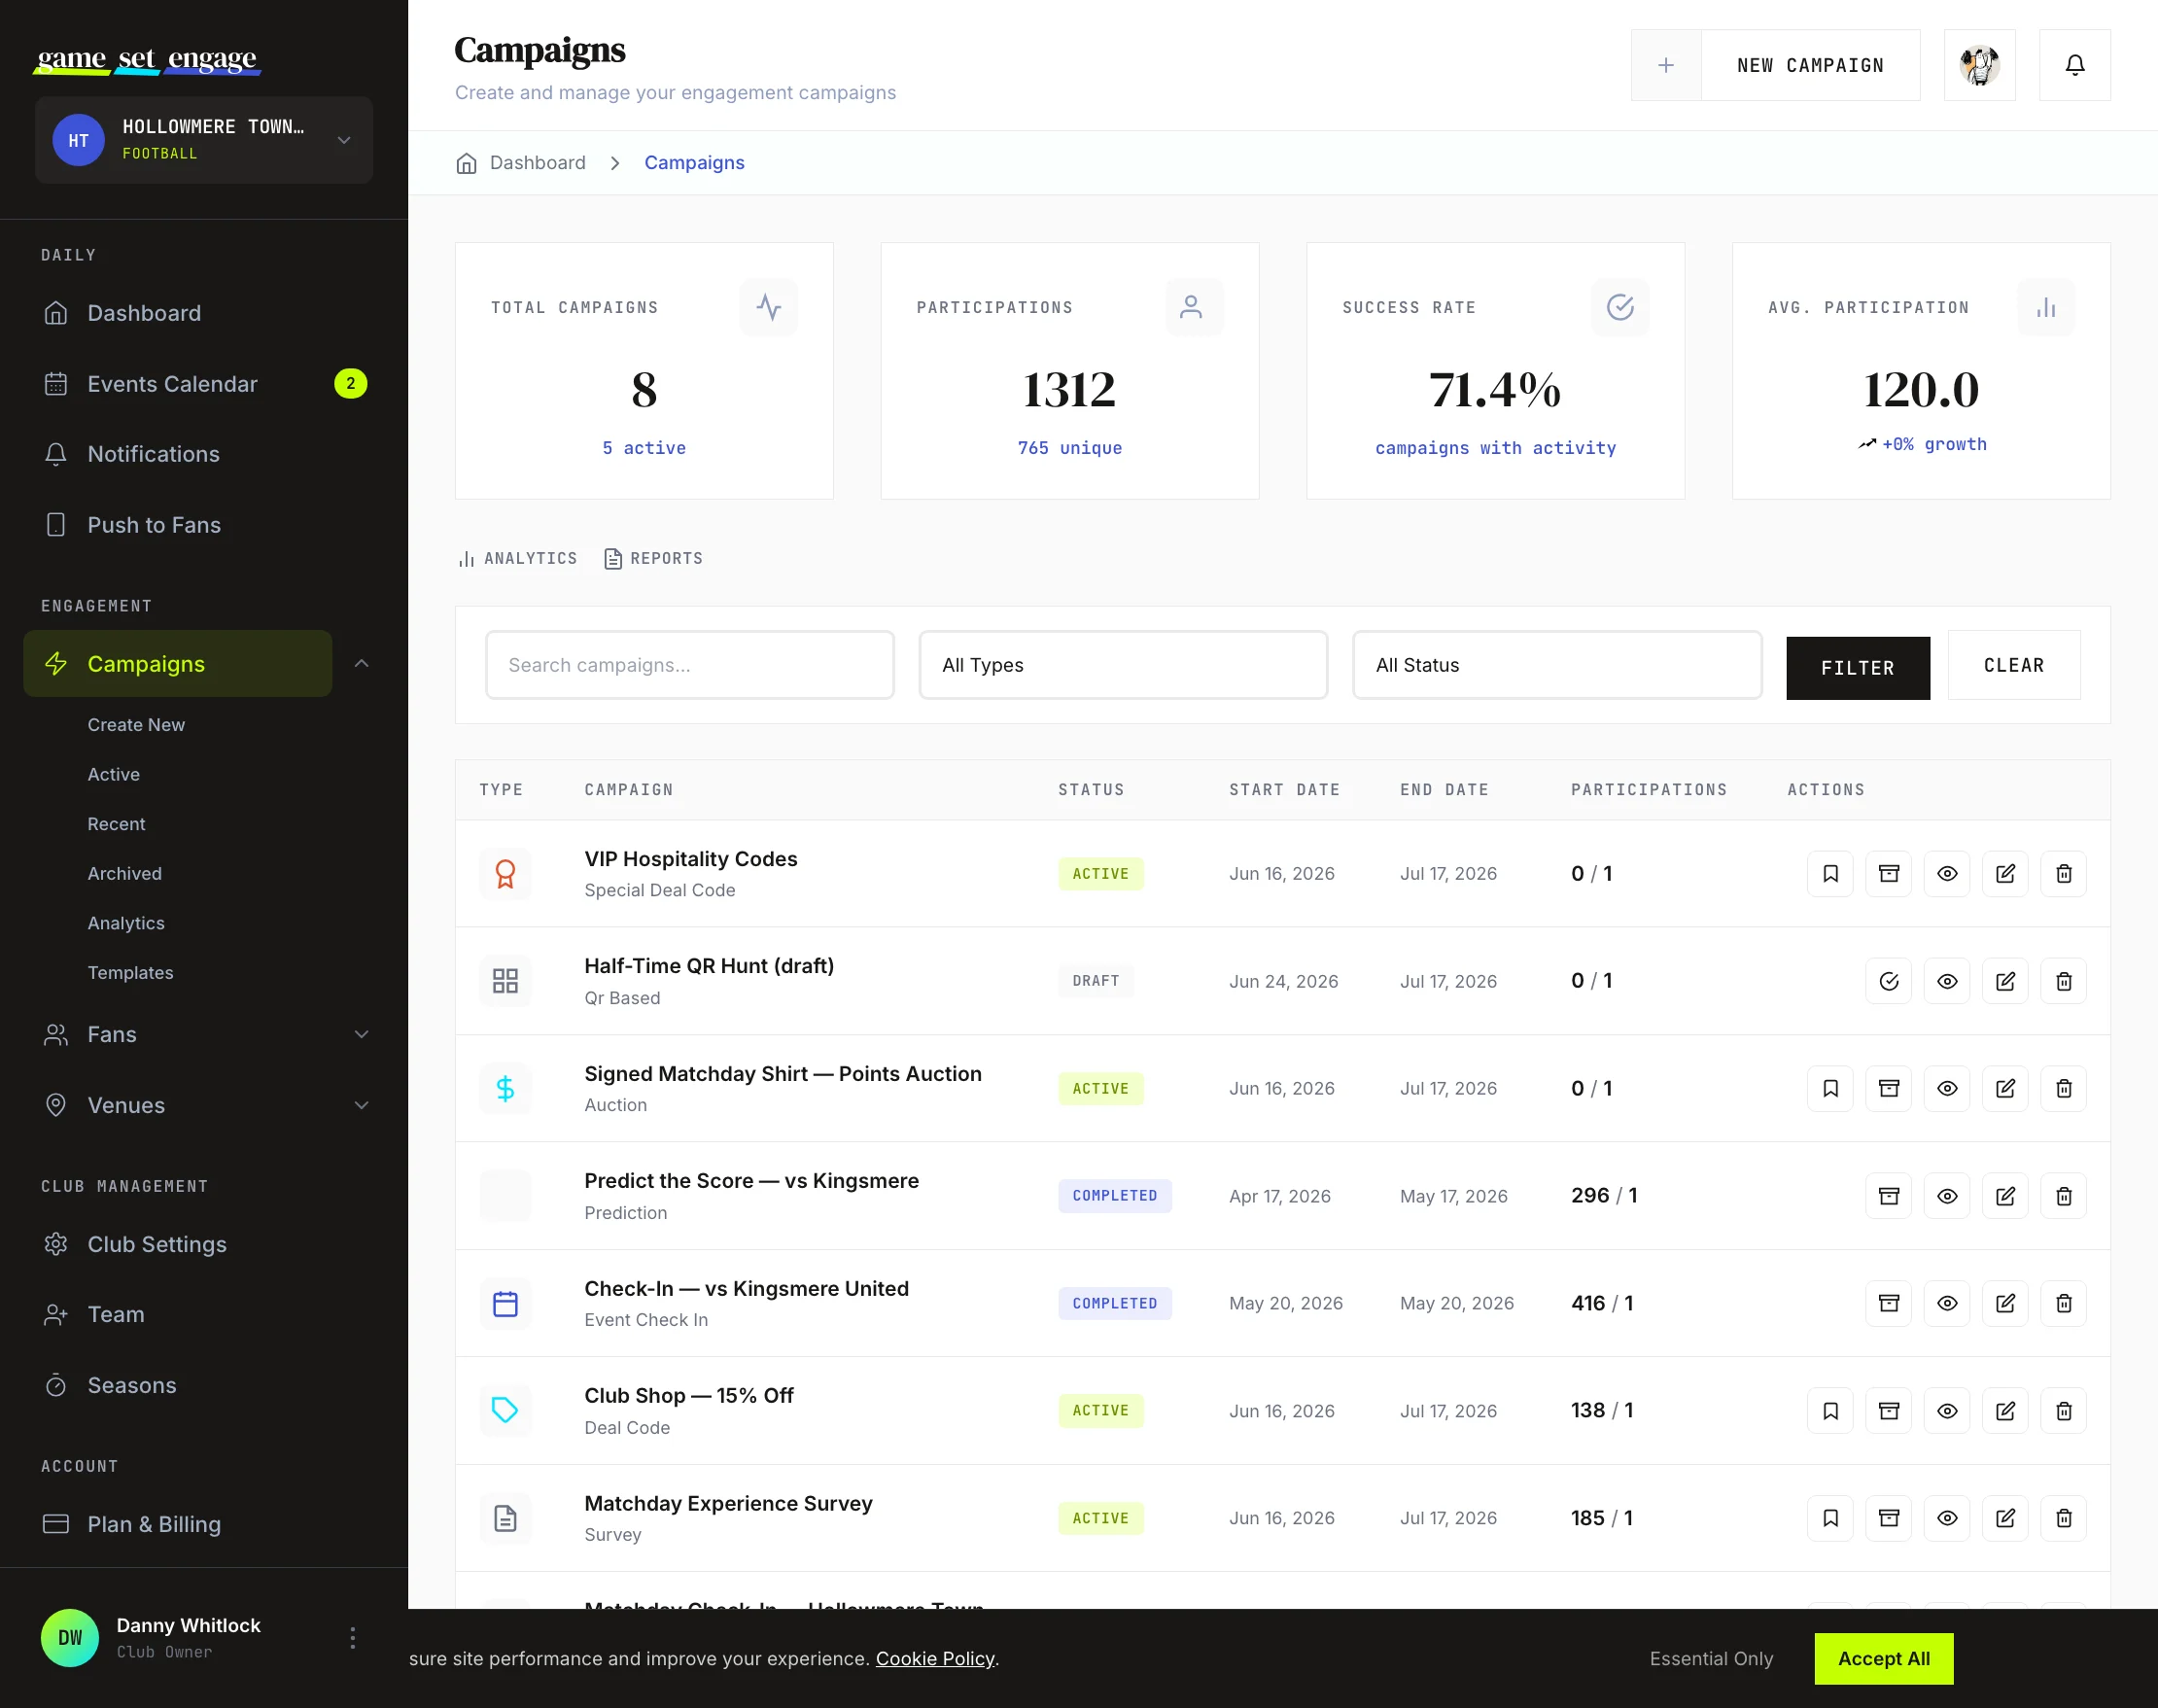
Pick the type that matches what you want to run. Each card shows the type's name and a short description. Click a card to select it.
The types you can choose from:
- Match / Event Check-in — fans check in around a match or event, tracked by location
- Open Campaign — a simple campaign fans can join anytime
- Deal Code — show a shared discount code to fans when they join
- Special Deal Code — give each fan a unique code from a pool you manage
- QR Based — generate a QR code fans scan to take part
- Survey — ask questions and collect feedback
- Auction — fans bid their engagement points on prizes and experiences
- Prediction — fans predict outcomes and earn points for correct answers
If you pick Match / Event Check-in, an extra box appears asking you to select an event. Check-in campaigns must be tied to an event, and the campaign's dates are set automatically from that event's schedule. Choose the event from the dropdown before moving on.
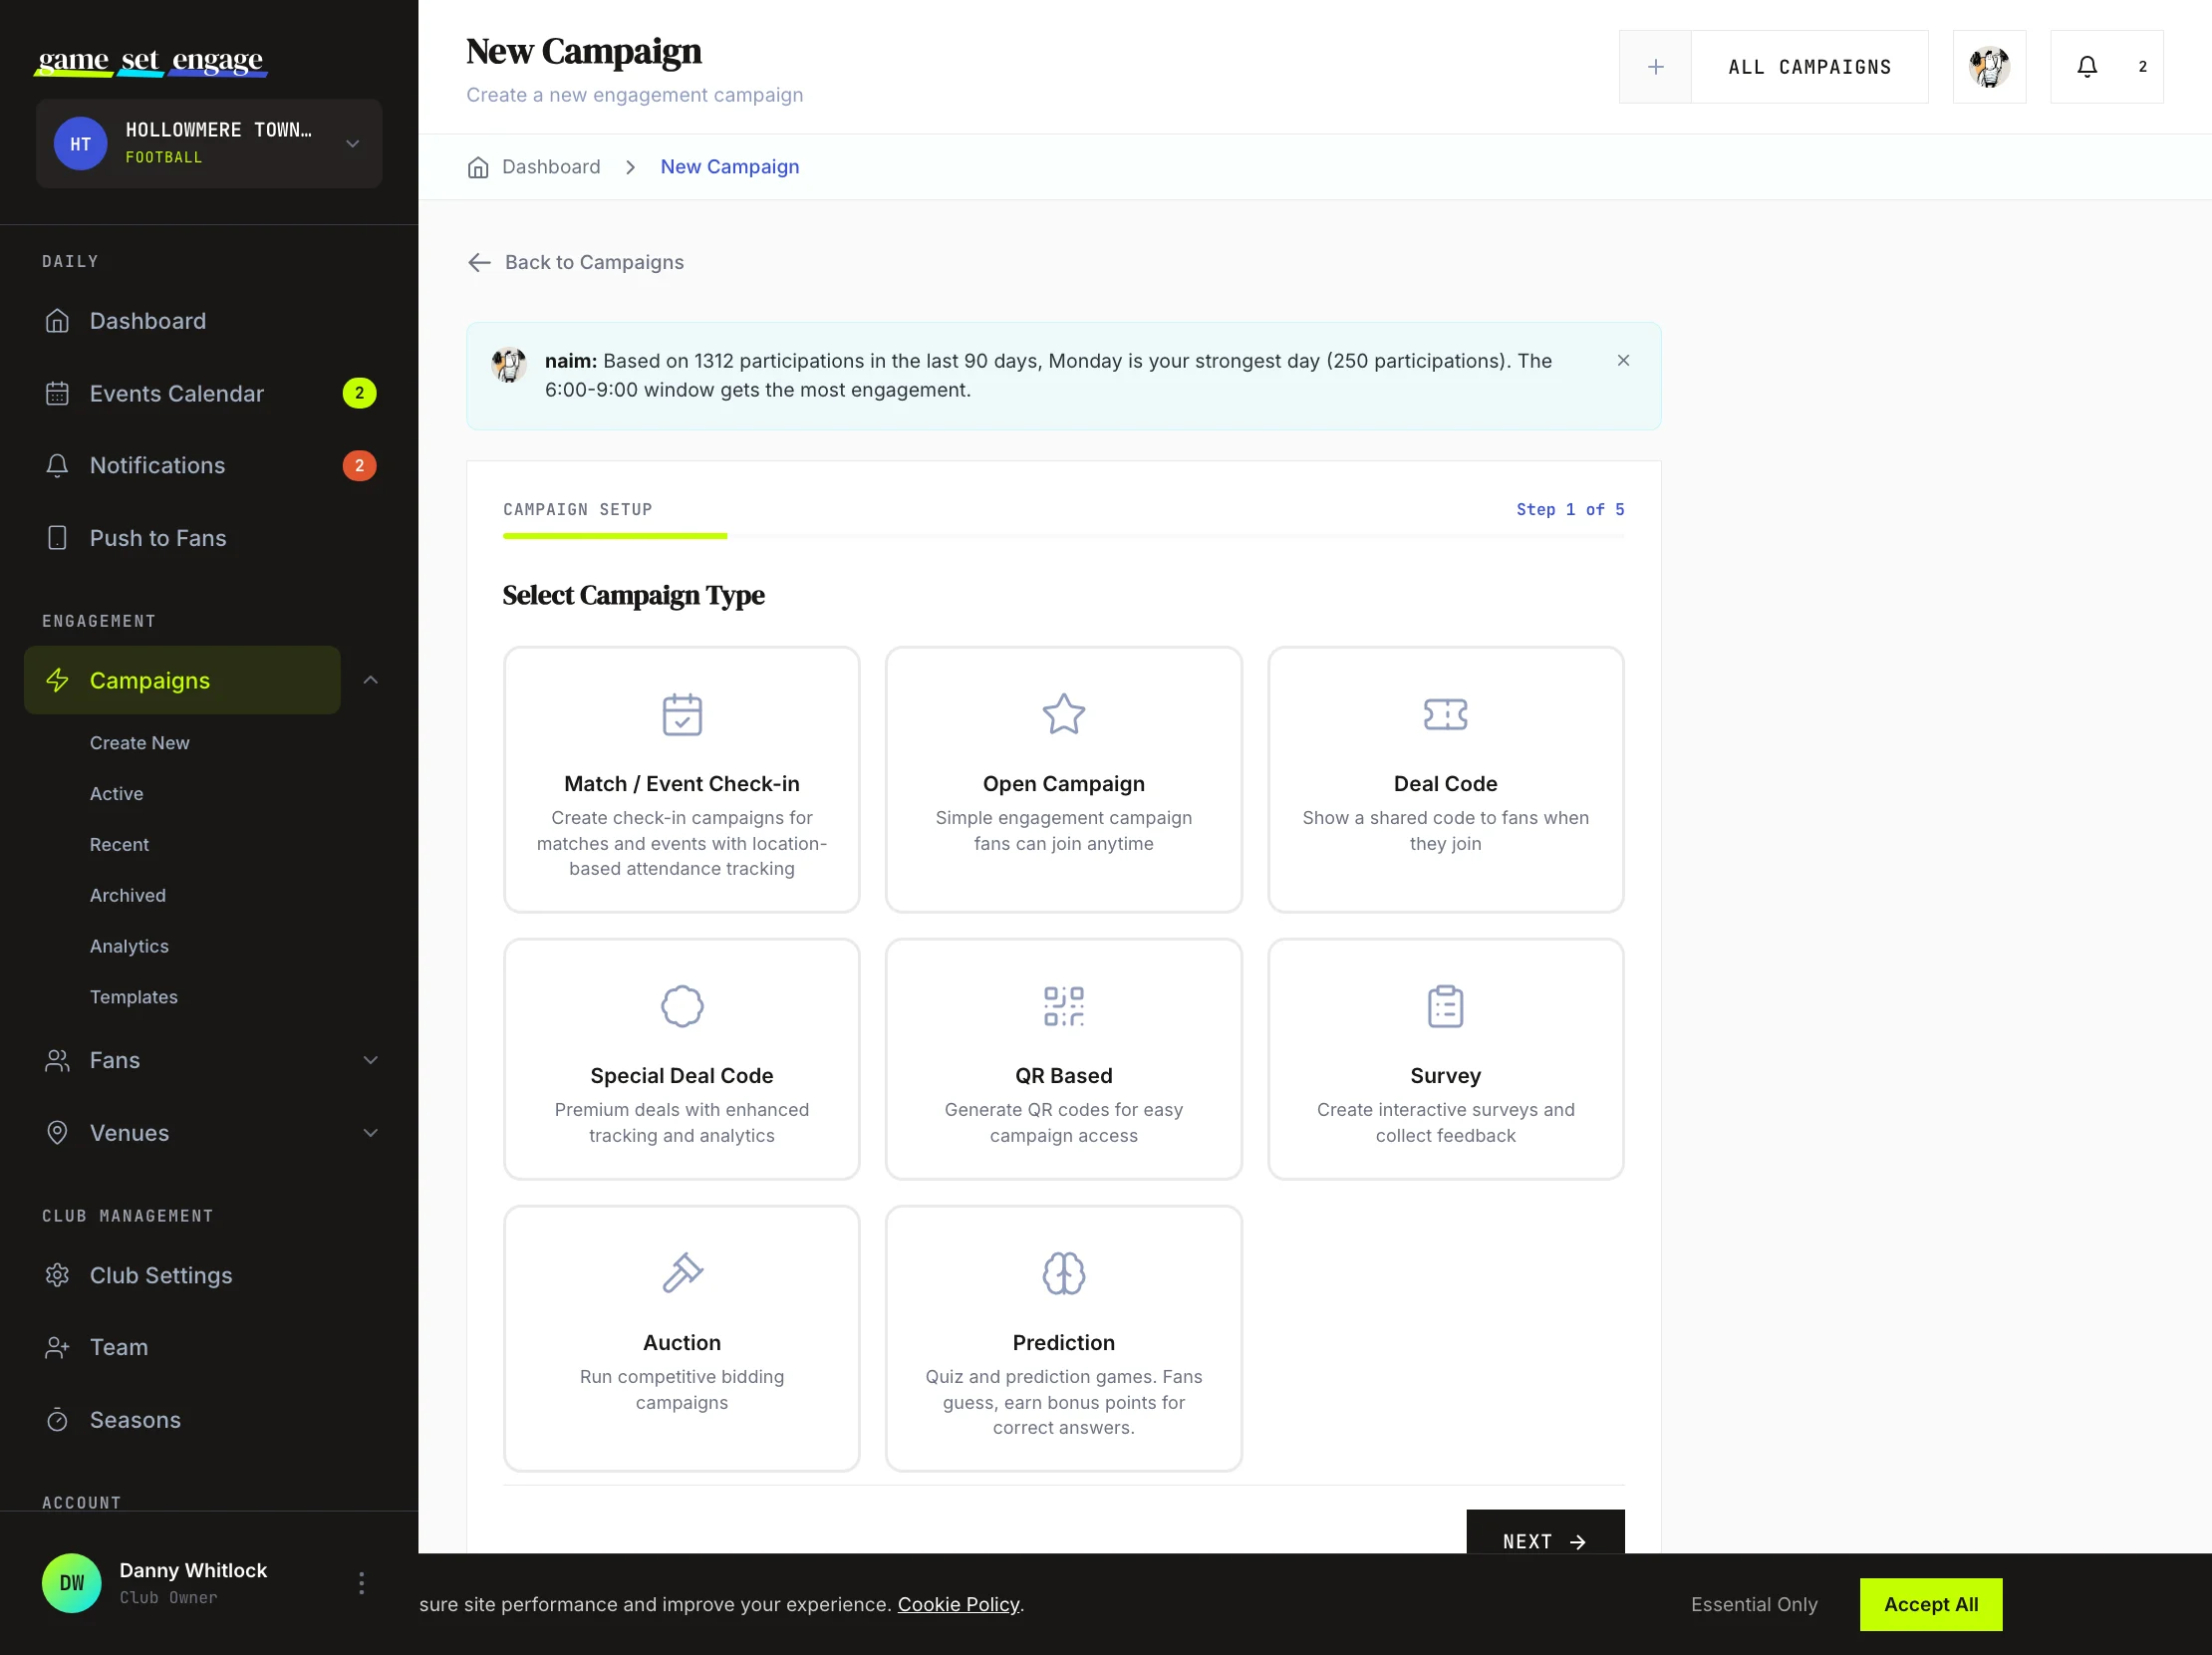
For a full breakdown of every type — what fans experience and how points work — see Campaign types explained.
When you've made your choice, click Next.
Step 2: Campaign details
This step covers the basics fans see, plus any fields specific to the type you picked.
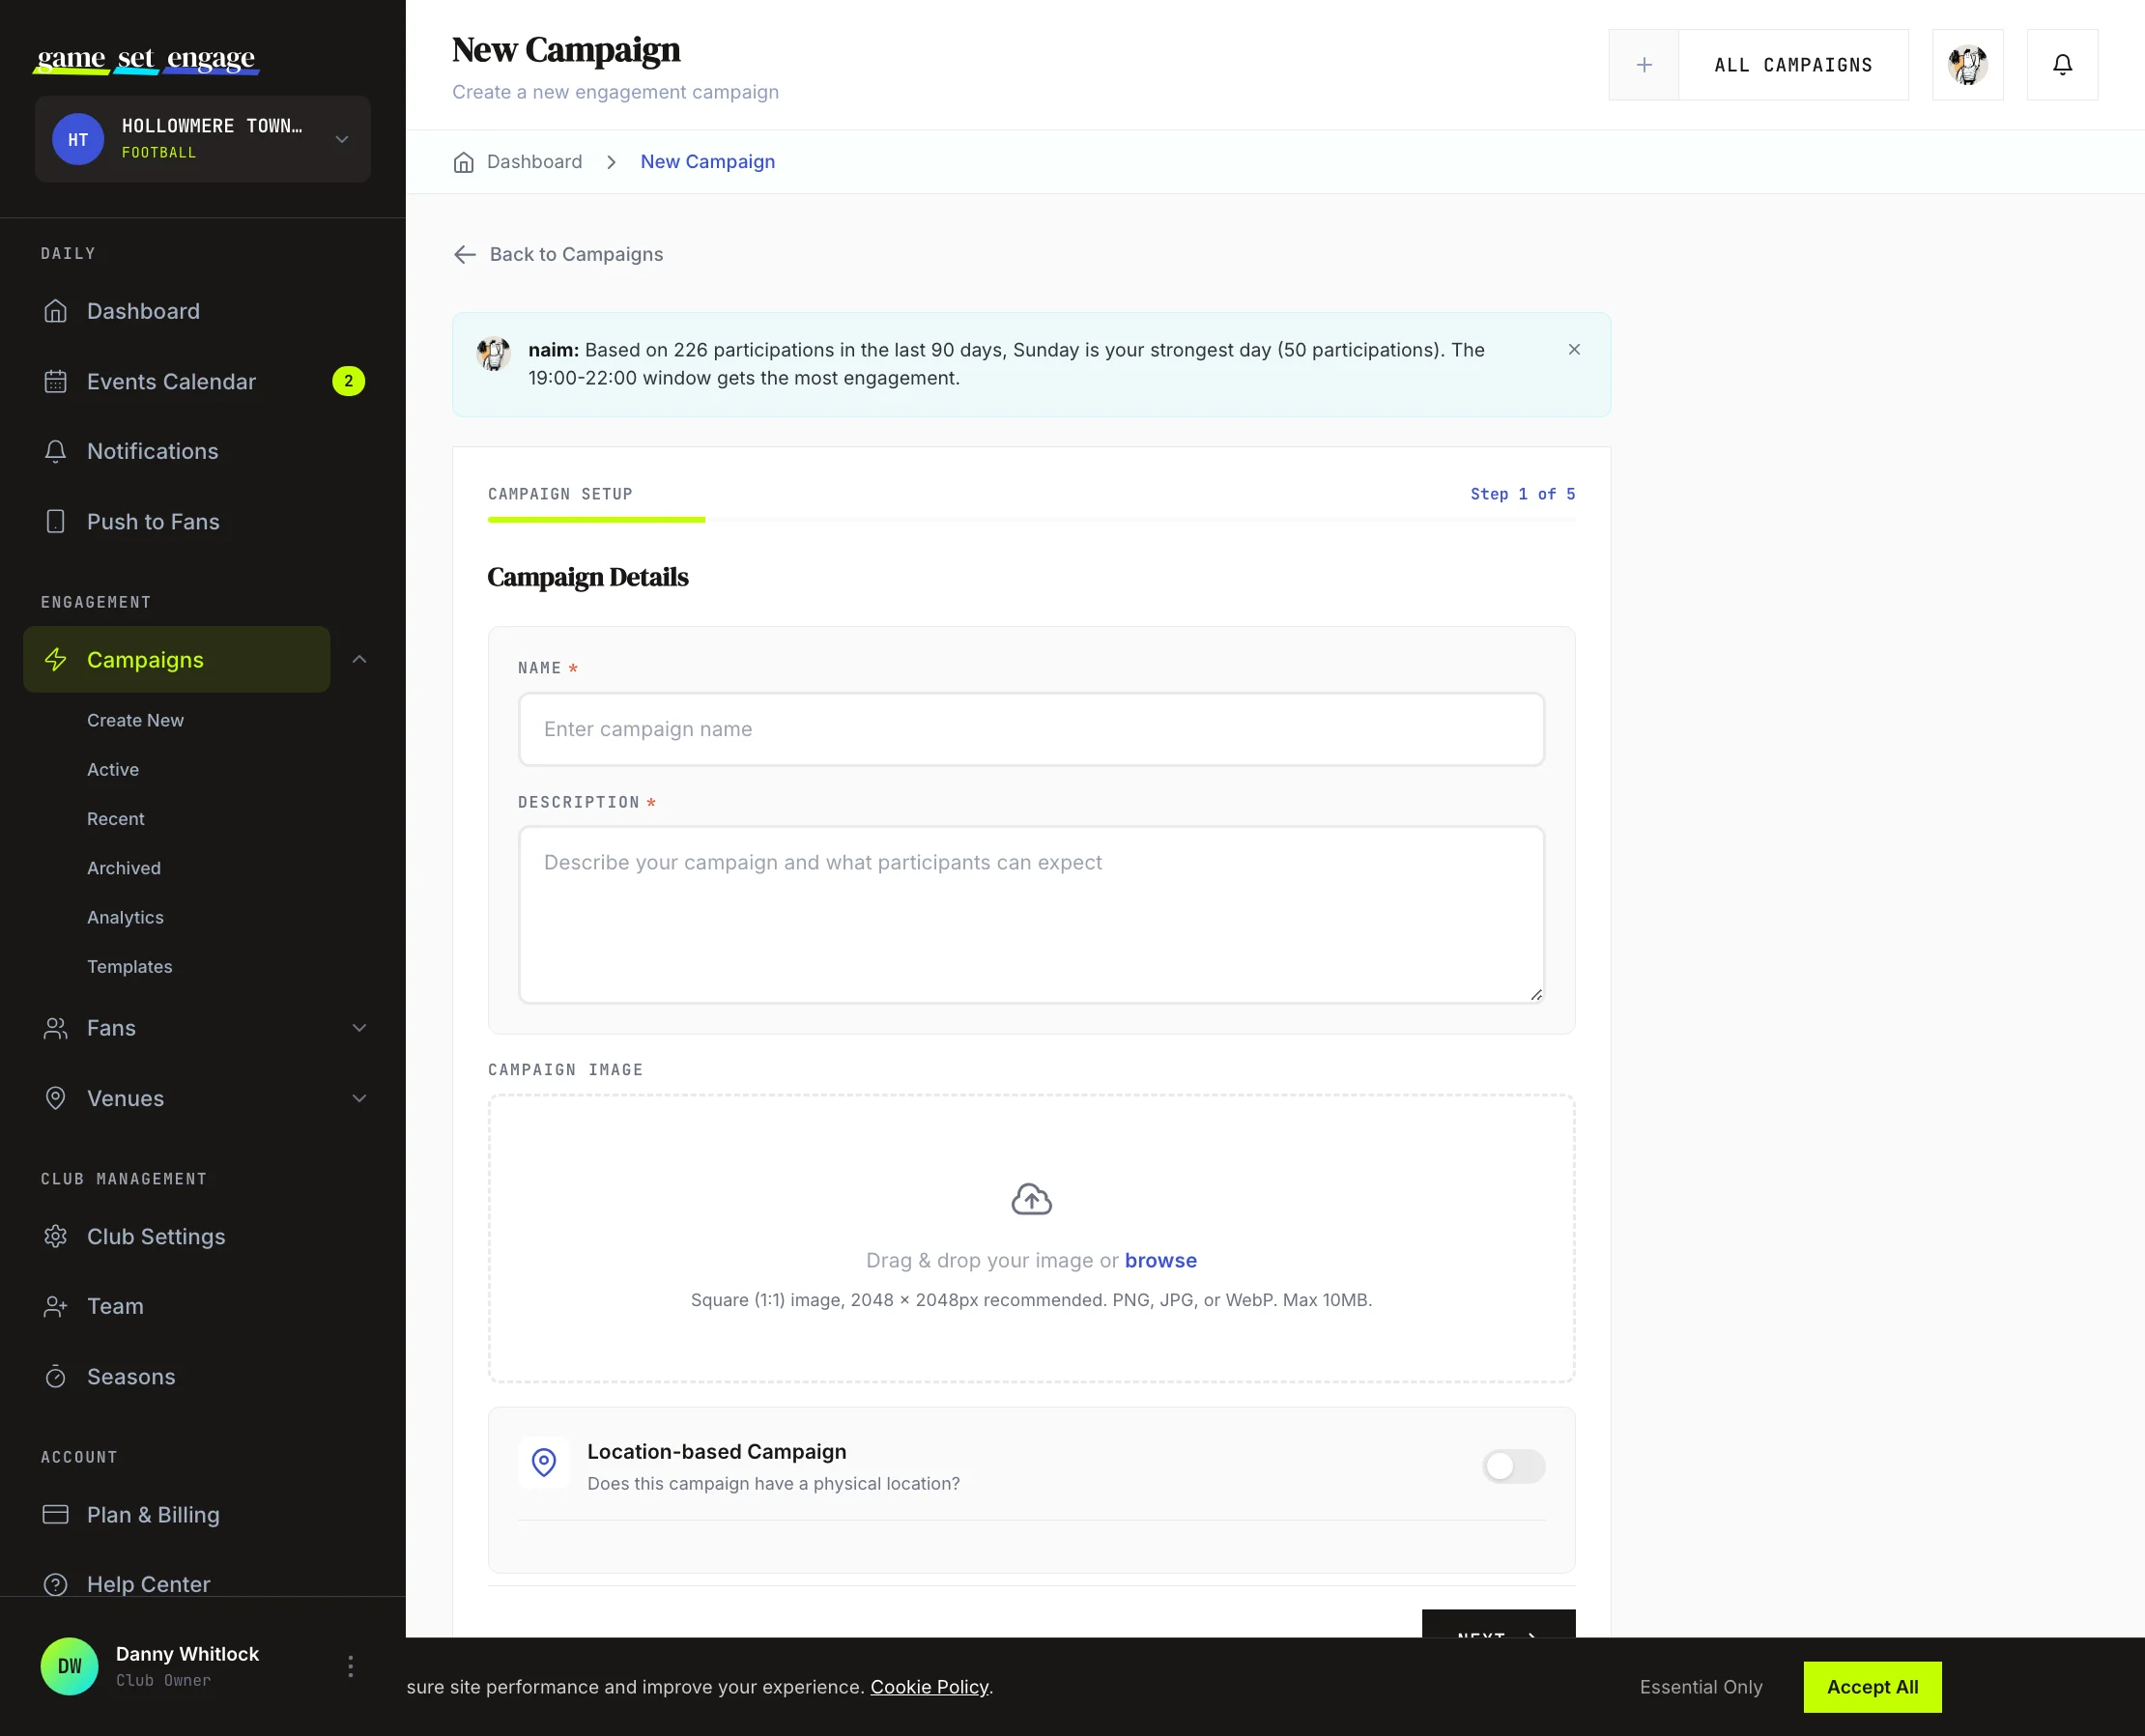
- Name — what the campaign is called. (For check-in campaigns, this fills in from the event if you leave it blank.)
- Description — a short explanation of the campaign and what fans can expect. This is required.
- Campaign Image — drag and drop an image or click to browse. A square (1:1) image, 2048 × 2048px, works best. PNG, JPG, or WebP, up to 10MB.
Depending on your chosen type, you'll also see one of these:
- Deal Code — the single code shown to every fan after they join (Deal Code type)
- A note that unique codes are managed after creation (Special Deal Code type)
- QR Code Data — optional custom data to encode; leave blank to auto-generate (QR Based type)
- The survey or prediction question builder (Survey and Prediction types)
- Starting Bid and Bid Step, both in points (Auction type)
Setting a location
Below the type-specific fields is a Location-based Campaign toggle. Turn it on if fans need to be in a specific place to take part. You then pick how to set the location:
- Home Ground — your club's stadium or pitch, if you've set one in your club profile
- Partner — choose a venue you've approved as a partner (a pub, bar, or restaurant)
- Search Location — type a place name and pick it from the search results
You also set a Location Radius (km) — how close a fan has to be to count. For check-in campaigns the location comes from the linked event, so this section behaves accordingly.
Tip: To use the Partner option, you first need approved venues. The Building your venue partner network guide covers how to add them.
Click Next when the details look right.
Step 3: Timing and limits
This step controls when the campaign runs and how many times fans can take part.
- Start Date and End Date — when the campaign opens and closes. Both are required, and the end must come after the start. (For check-in campaigns these are filled in from the event.)
- Participation Quota — the maximum total participations across all fans. Leave it at 0 for unlimited.
- Limit Per User — how many times each fan can take part. The default is 1. For check-in campaigns this is locked to 1, since a fan checks in once per event.
- Price Per Participation ($) — an optional monetary value per participation. If you set one, the builder shows an Estimated Total Value (price × quota) to help you plan.
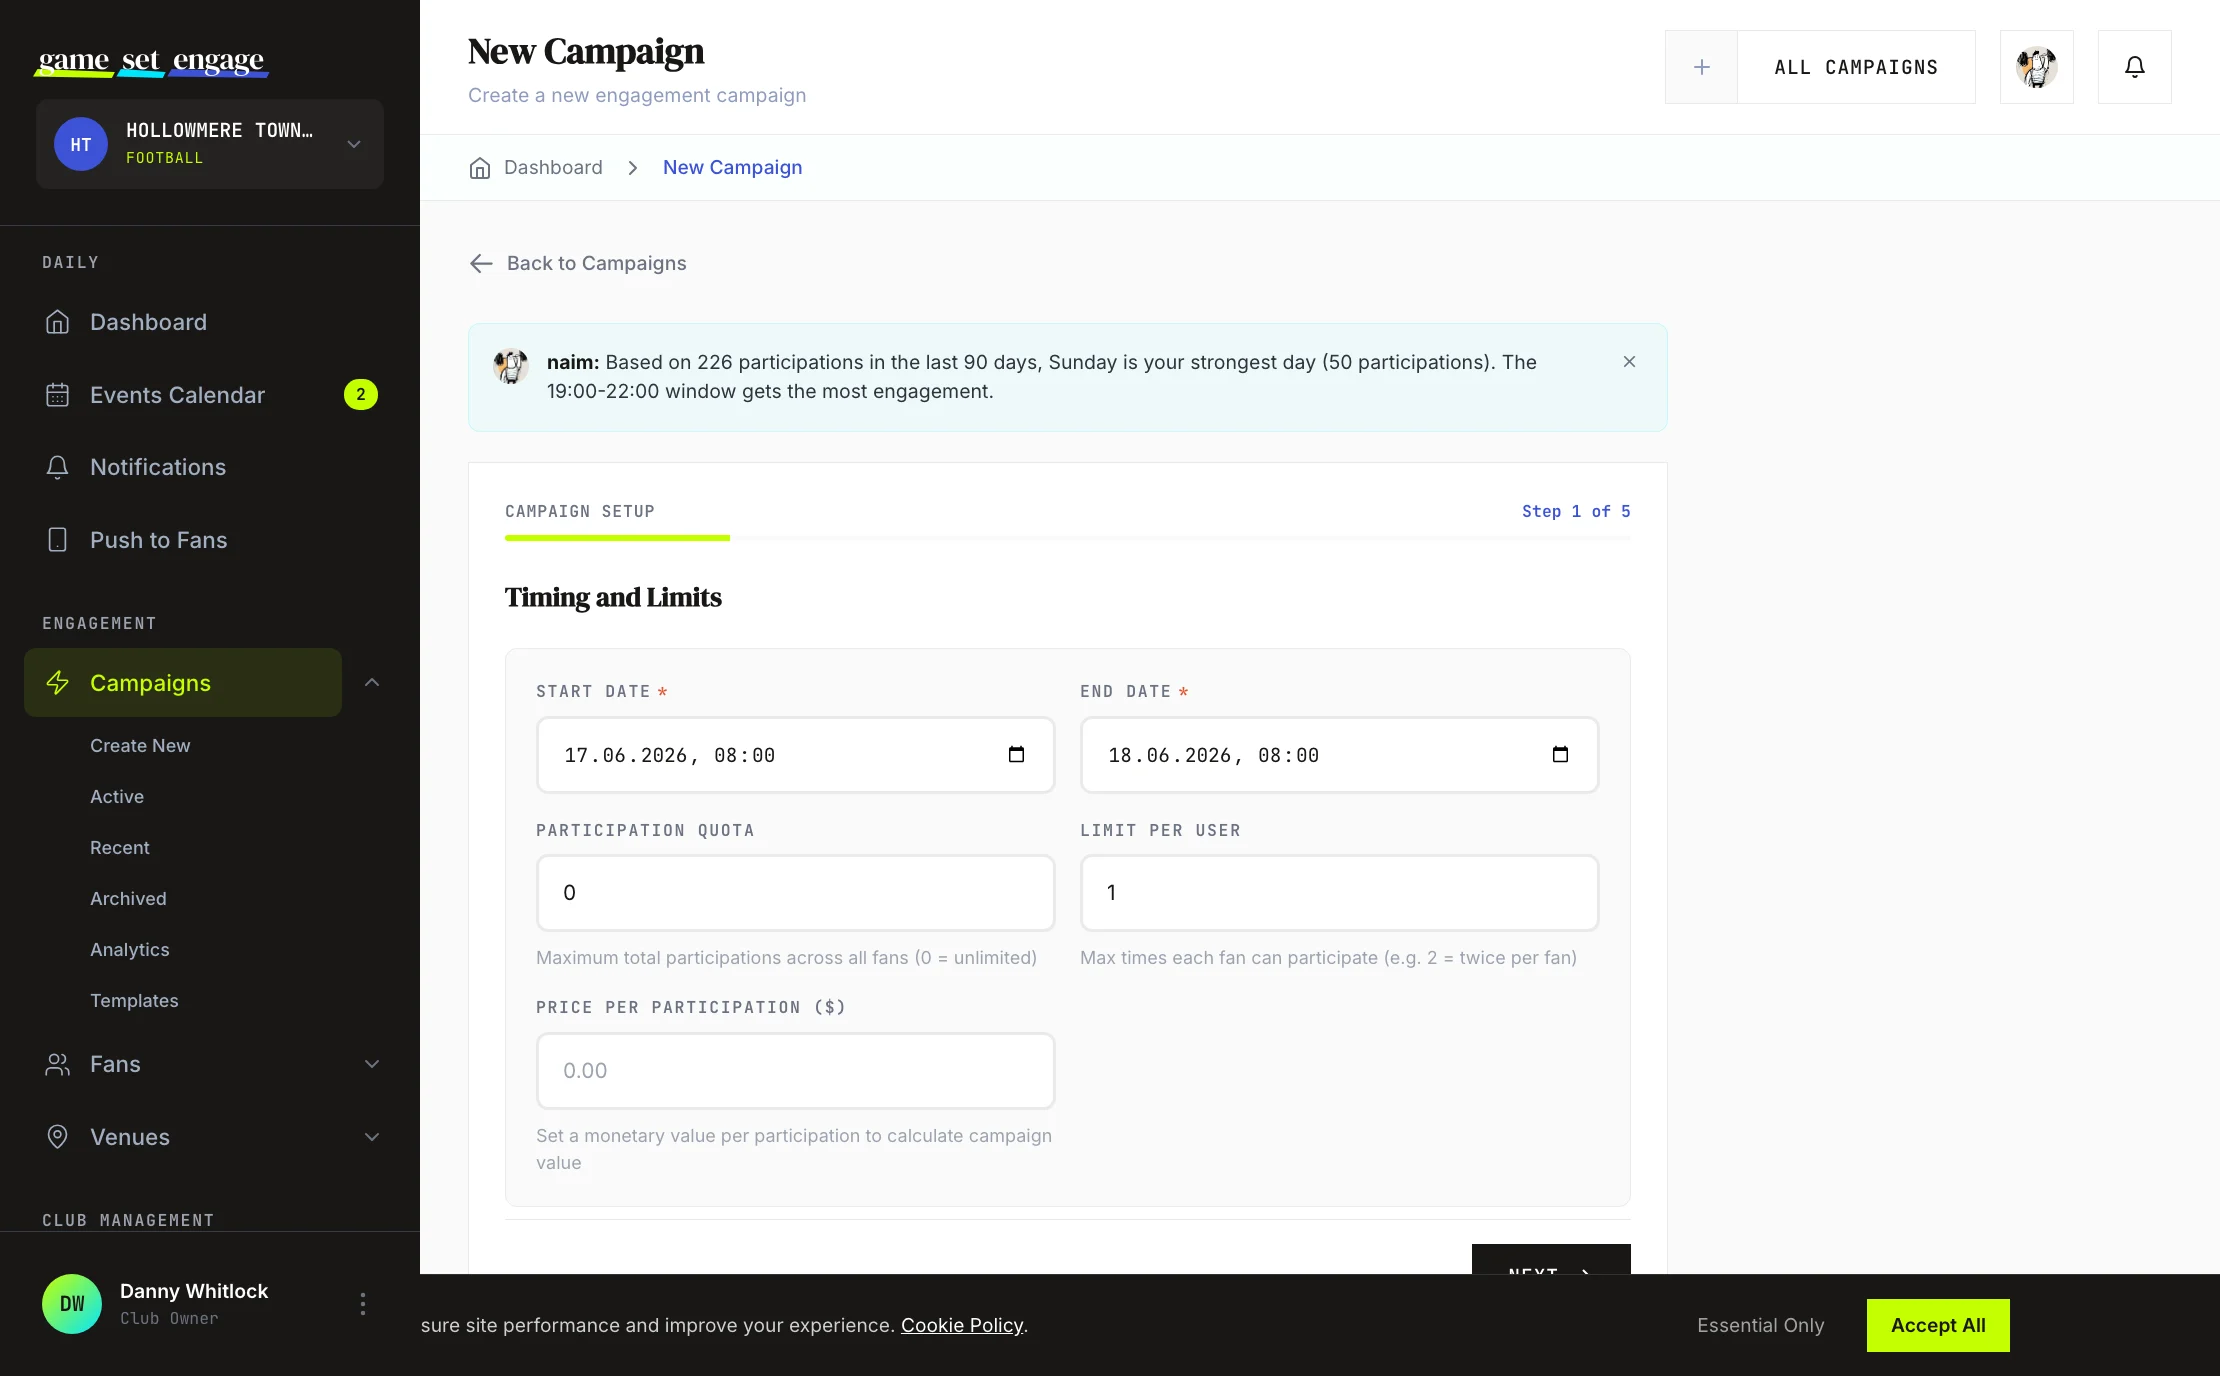
Tip: "0 = unlimited" applies to the Participation Quota field. The per-user limit defaults to 1, so by default each fan takes part once. Raise it if you want fans to be able to join more than once.
Click Next to set up rewards.
Step 4: Points and rewards
This is where you decide what fans earn.
- Engagement Points — the points a fan earns for taking part. A positive value rewards the fan. A negative value charges points instead (useful when a fan spends points to redeem a paid deal) — fans without enough points to cover the cost are blocked from joining.
For Match / Event Check-in campaigns, you also set points for different check-in locations:
- Engagement Points here are for checking in at the main location (the stadium or main venue)
- Home check-in points — for fans checking in away from the main location, such as watching at home. Leave it at 0 to require fans to be at the main location.
- Partner venue check-in points — for fans who check in at an approved partner venue, verified by the venue
This is how the check-in reward tiers work: more points for being at the ground, fewer for a partner venue, fewer still for home. The platform's standard pattern is 5× at the stadium, 3× at a partner venue, 1× at home — you set the actual point values for each tier here.
For Prediction campaigns, points are awarded per correct answer only — taking part alone earns nothing. Fans get their points when you resolve the result and set the correct answer.
You can also link a Bonus Campaign: pick an active or completed campaign, then set Bonus Campaign Points awarded to fans who take part in both.
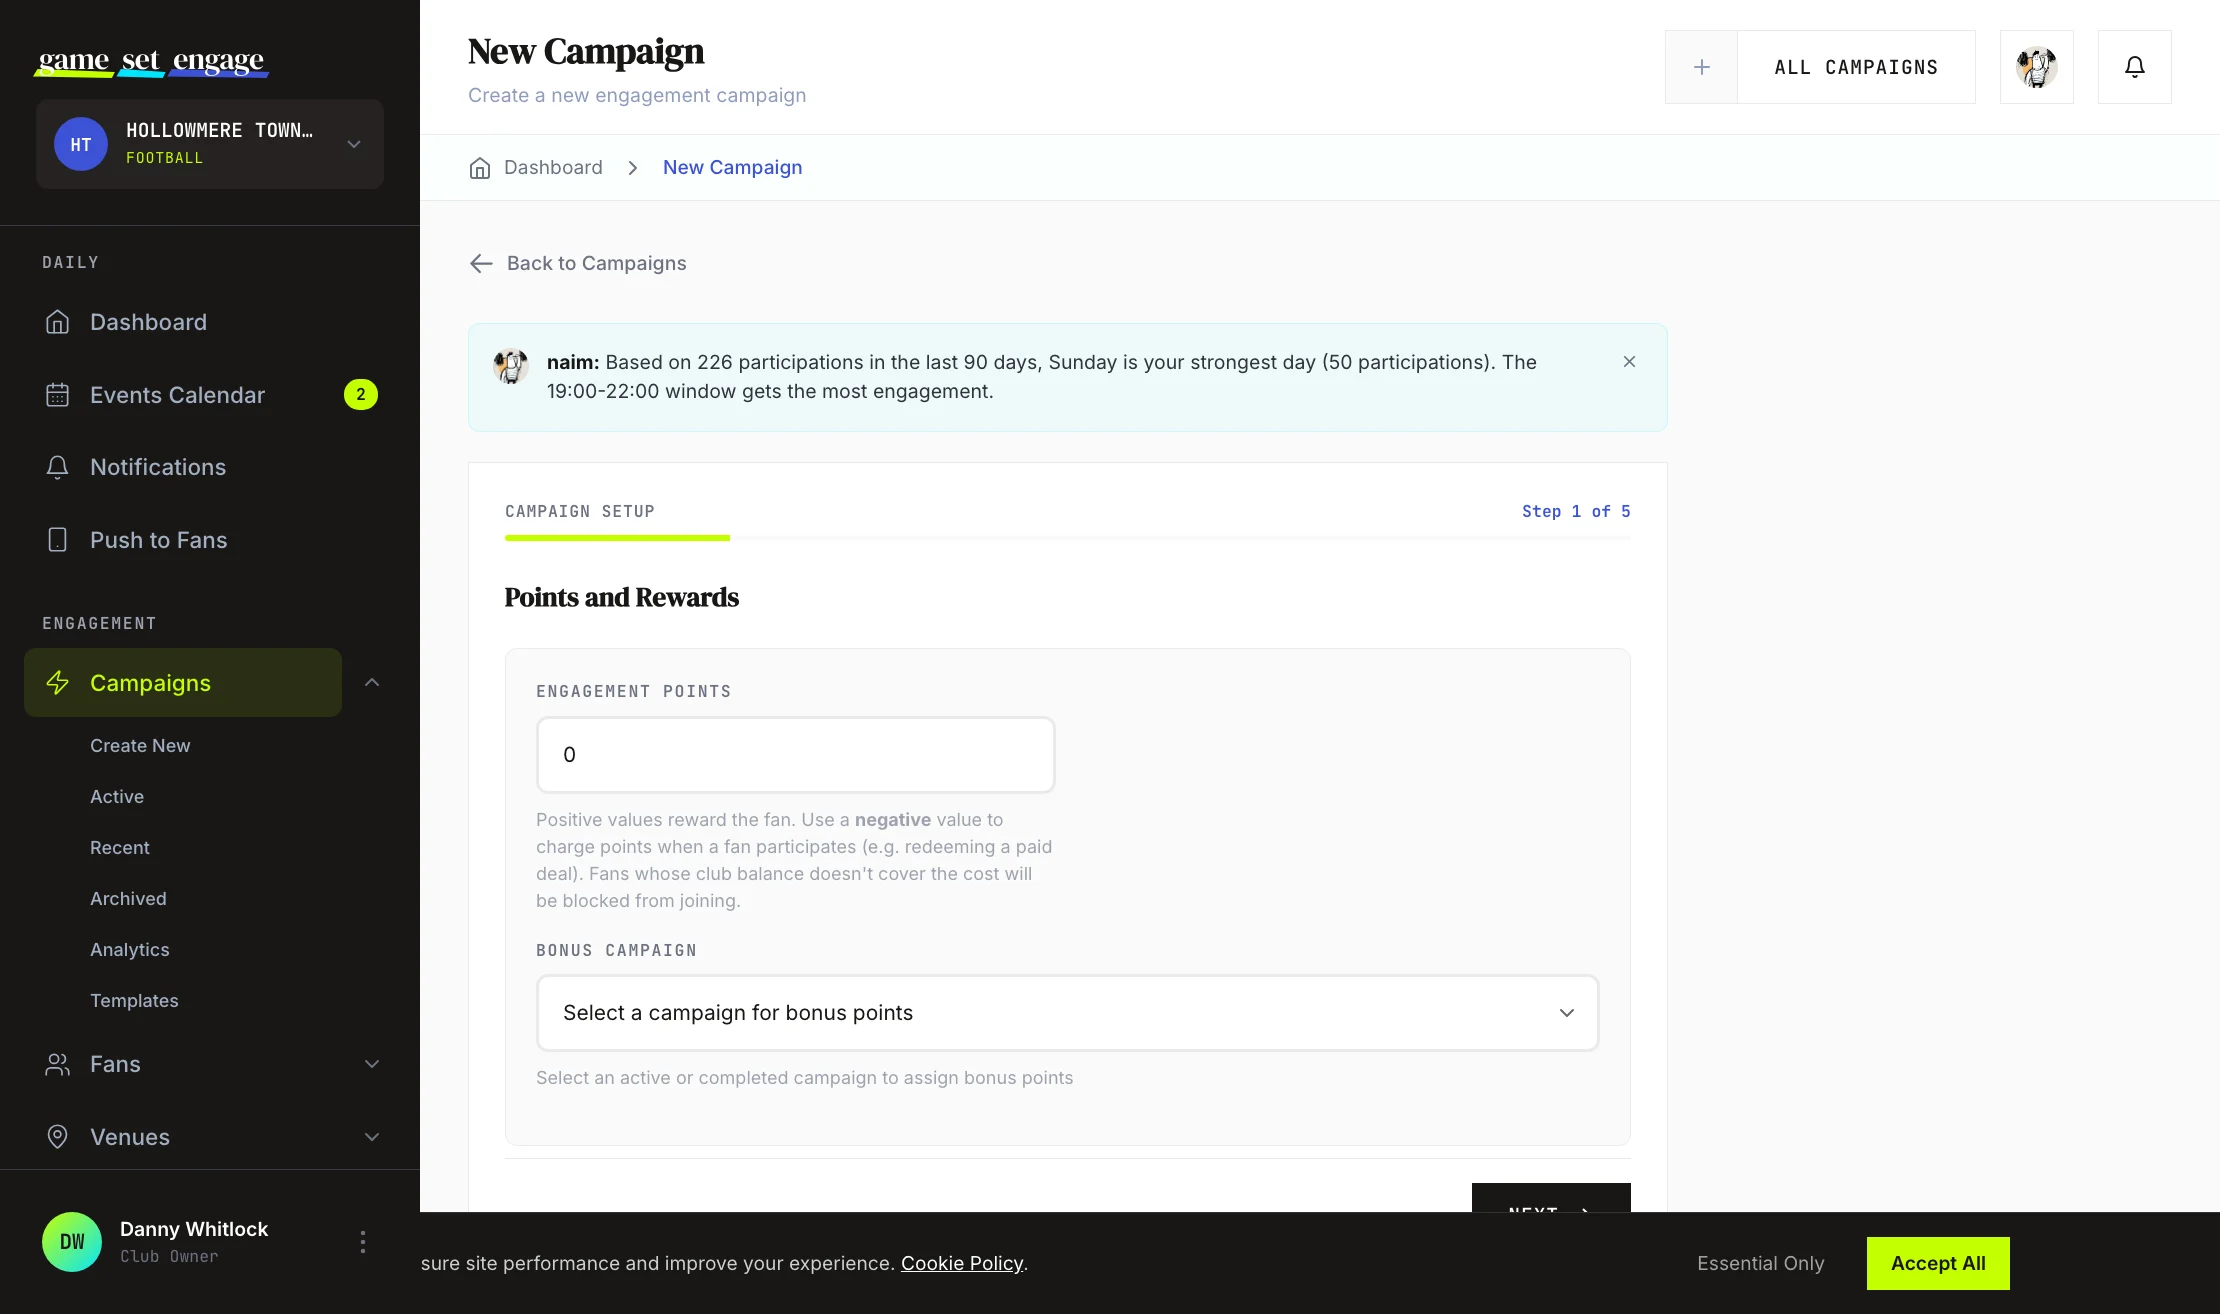
Click Next for the final step.
Step 5: Additional information
The last step is optional copy that polishes the fan's experience.
- Legal Text — terms, conditions, or disclaimers shown with the campaign
- Post Success Title and Post Success Text — the message a fan sees after taking part
For Survey and Prediction campaigns, you'll also see fields for the wrong answer and awaiting result screens, so a fan who guesses incorrectly — or who answered before you confirm the result — doesn't see the winning message. Leave these blank to use the system defaults.
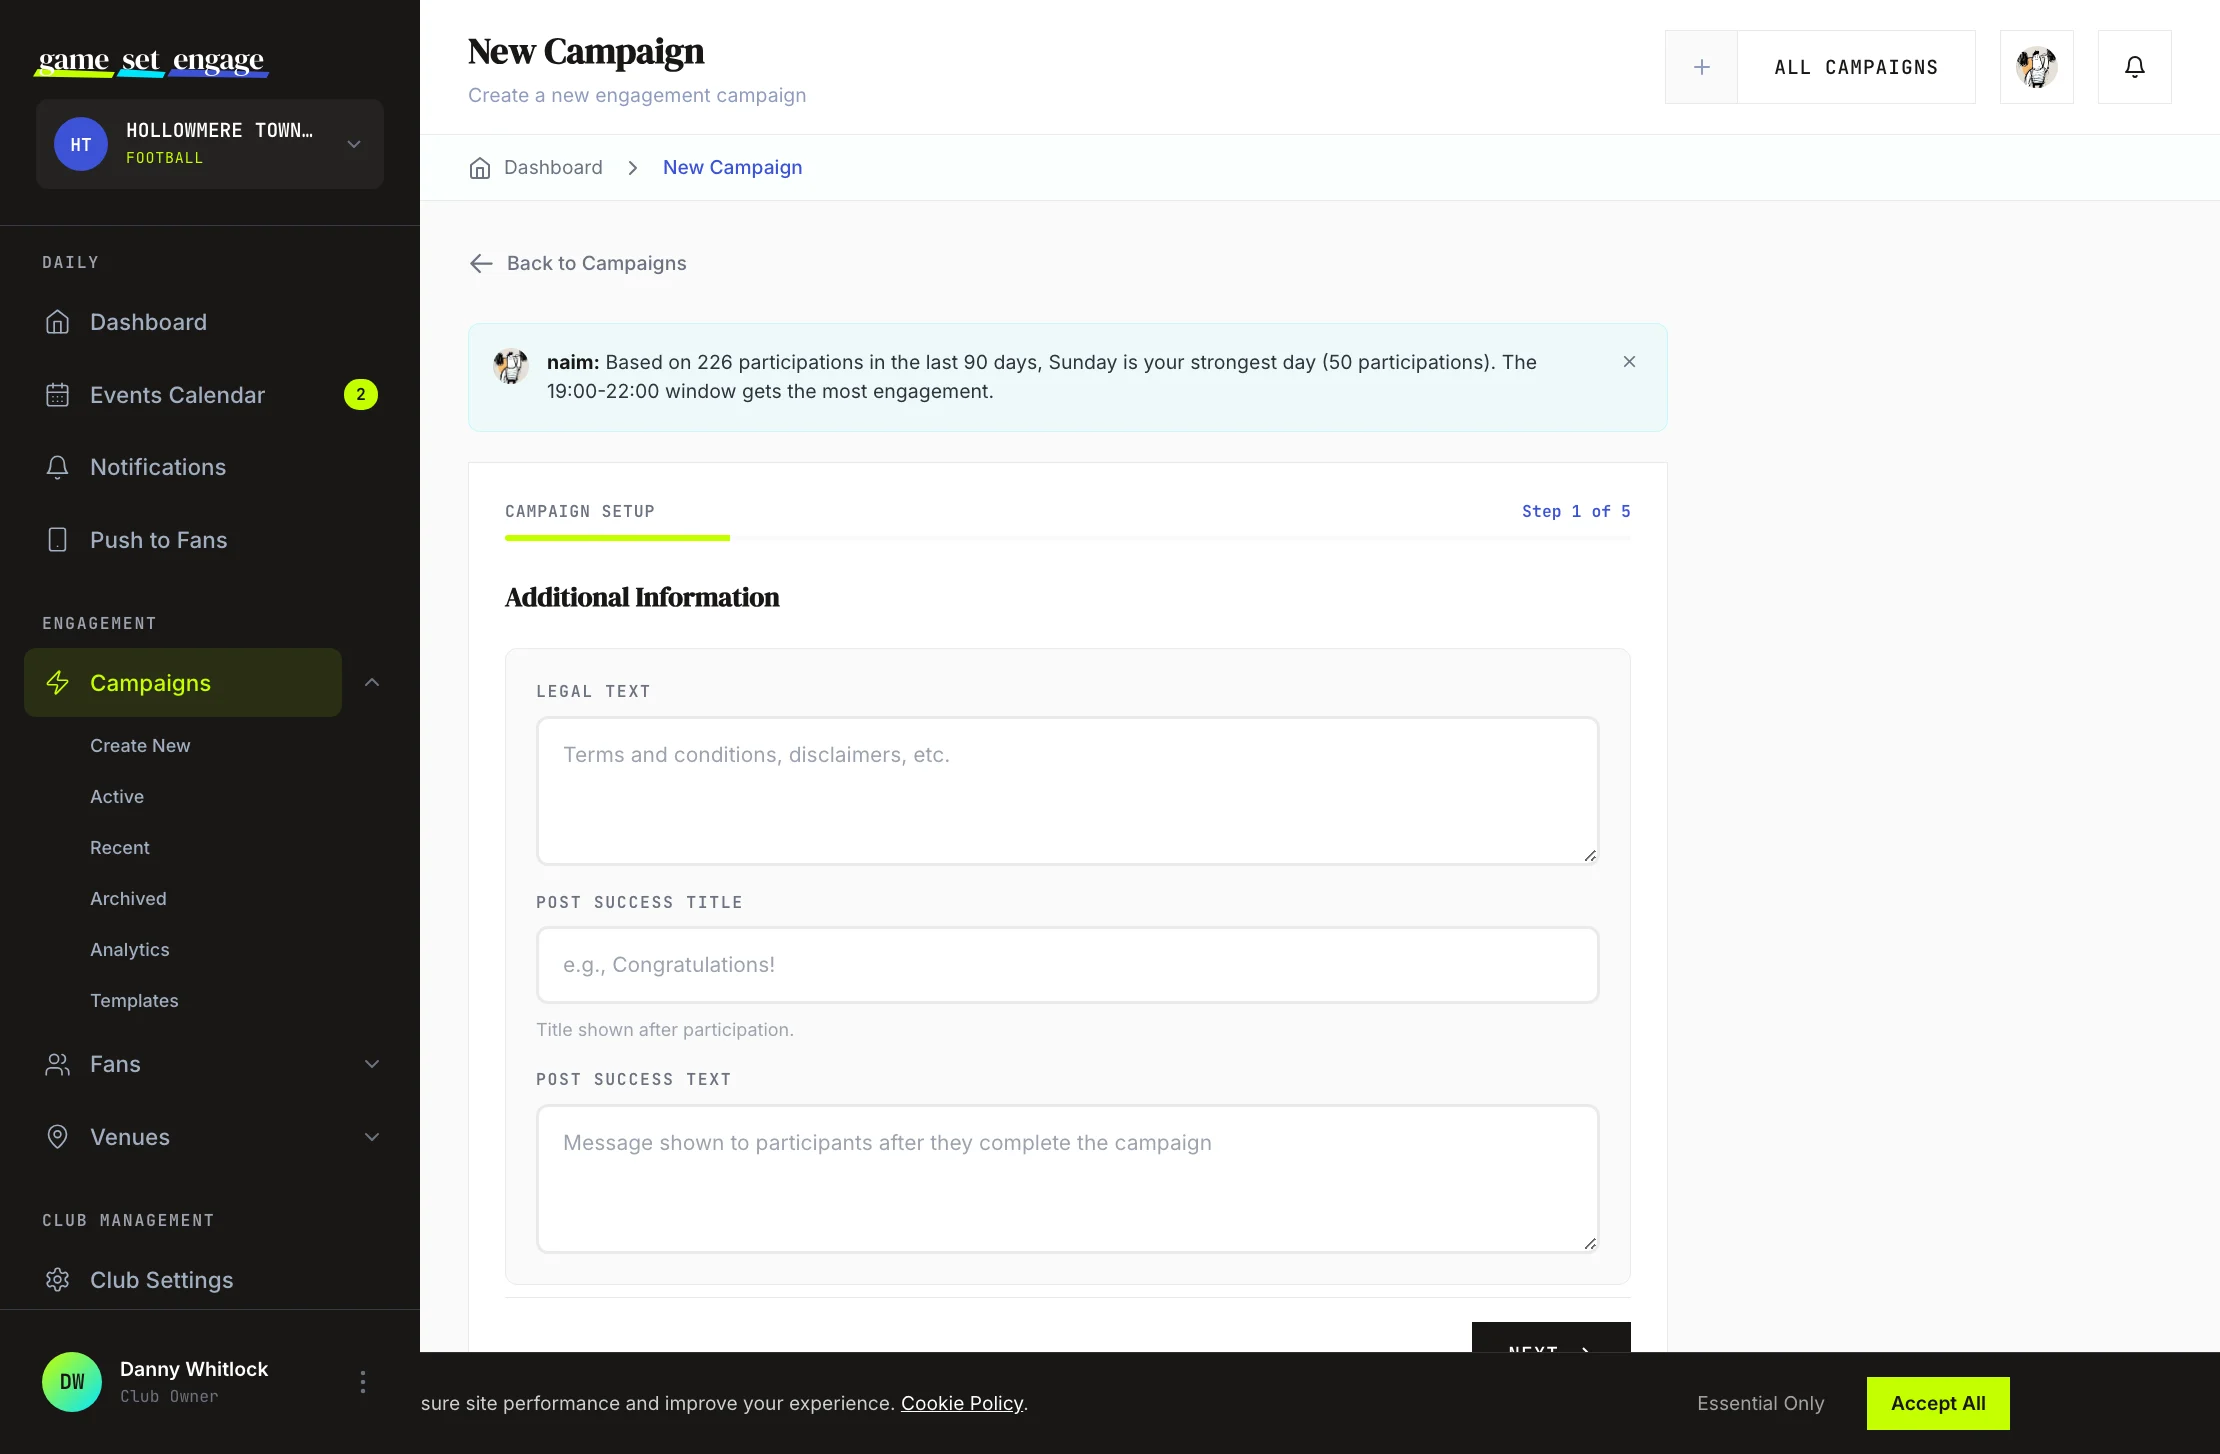
Save as draft or publish
At the bottom of the final step you have two choices:
- Save as Draft — stores the campaign without making it live. Drafts don't appear to fans, so you can come back, finish, and publish later.
- Publish Campaign — makes the campaign active. Once it's live and inside its date range, fans can take part in the mobile app.
After you save, you land back on the Campaigns list with a confirmation. (If you chose Special Deal Code, you're taken straight to the page where you add the unique codes.)
Tip: Not ready to commit? Save as a draft. You can edit every field and publish whenever you like. See Managing and publishing campaigns for how drafts become live campaigns.
What's next
You've built your first campaign. From here:
- Campaign types explained — compare all nine types and pick the right one next time
- Prerequisite and bonus campaigns — chain campaigns together, and the two traps to avoid
- Managing and publishing campaigns — drafts, publishing, editing, and archiving
- Deal codes and discount codes — set up shared and unique codes
- Campaign analytics and reports — read your results once fans start taking part